
Up until now, there have been two ways to deal with our moving planet when capturing landscapes with the stars at night. First, shorten your exposure time and increase your ISO to keep the stars from streaking too much and yet still capture some of the Nebula dust in the Milky Way as well as other parts of the night sky. The settings for this technique, using a wide-angle lens of 24mm or wider, are as follows:
20 to 30-second shutter speed – f/2.8 or faster if possible – ISO 3200 to 6400, lower is better.
The second method was to use a tracker device that moves the camera in sync with the rotation of our planet, thus capturing the stars as pinpoints and recording as much light as could be recorded at a longer shutter speed.
There are issues with both techniques, including lugging around the tracker device itself as well as having to set up a second shot of the exact scene in order to capture the landscape part of the shot. The tracker method always required 2 exposures, one for the stars and one for the land to be blended in Photoshop. The first method required a similar blending technique when there was not enough light on the foreground and/or a different focus point was required for depth of field.
There is a new option, called the “Starry Landscape Stacker”, and it does not require any additional equipment. SLS is an app that requires you to capture at least 10 images for shorter shutter speeds (10/sec) which it then stacks to create a single file with the stars perfectly aligned. The only issue with this method is that it also requires you to blend two separate files together in Photoshop to achieve the best results, but then again so do the other techniques!
This blog post is not a tutorial on how SLS works, as their documentation is quite good, and can be found here.
I do have a few tips for obtaining great results considering the many options in both capture and processing.
Capture: When creating the multiple exposures I used10 frames, turned off “long exposure noise reduction” and took them consecutively. Set your camera to “continuous” shutter and “Manual mode”. Connect a cable release that can lock into the “Fire” position, thus continuous images will be taken as long as you leave it locked. Simply keep track of 10 frames and release. Once your sequence of star images is created, change your settings and create a “landscape” exposure using a much longer shutter time such as either 2 min or 20 min depending on the amount of moonlight or other ambient light. Don’t forget to turn back on “long exposure noise reduction”!
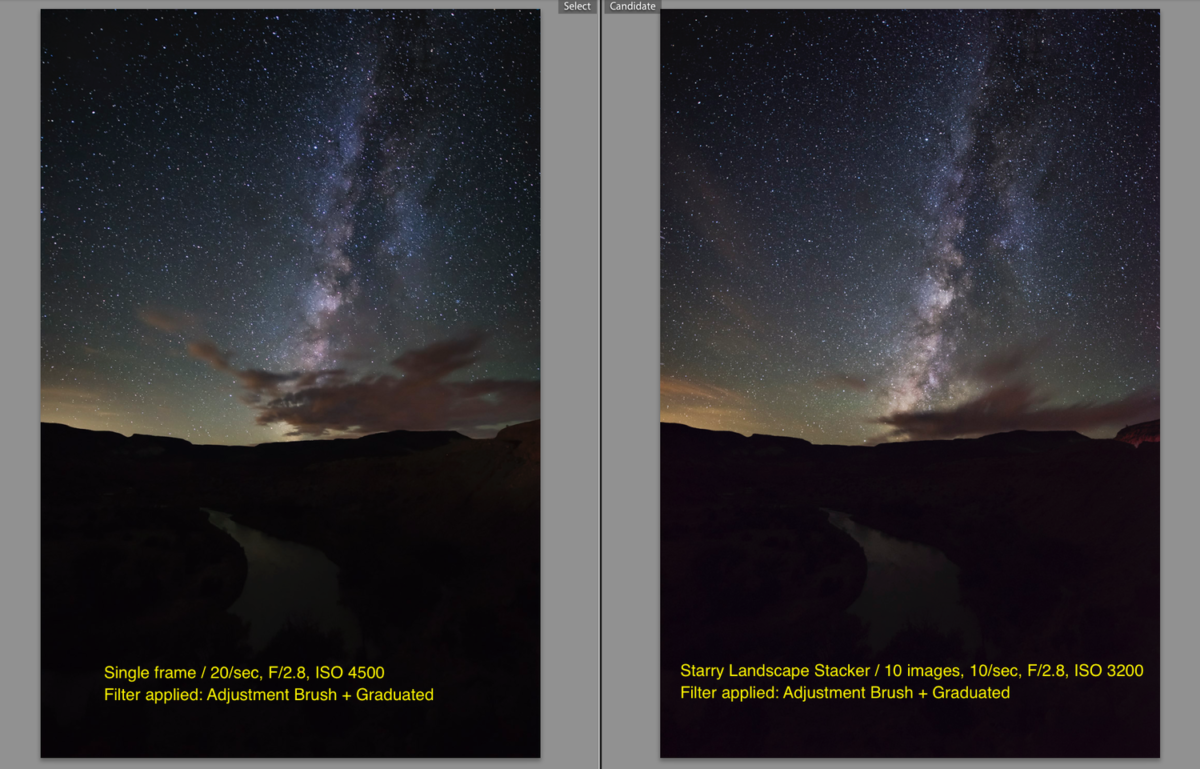
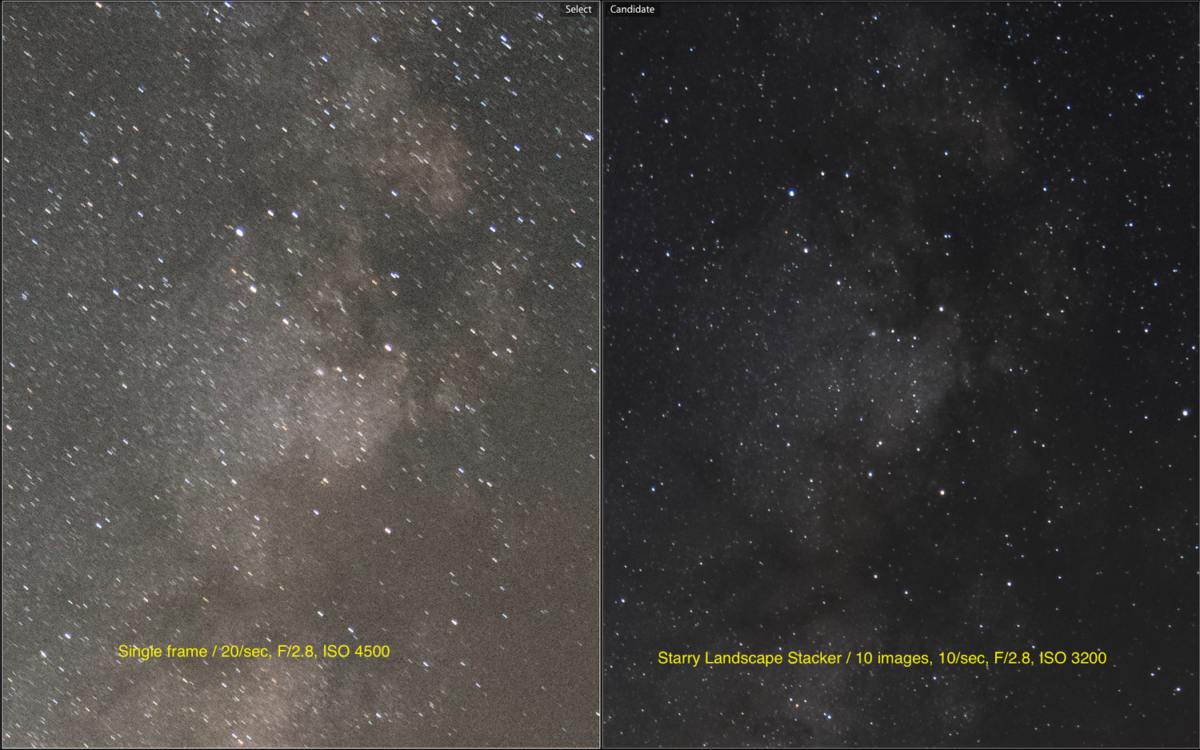
Processing: After importing the files into Lightroom, I added 3 adjustments. I increased the exposure by one stop, added luminance noise reduction, and added vibrance. Then sync these edits to the other 9 files and export them as 16bit tiffs. Once you complete the procedure for “finding the sky” in the SLS software and you export a new tiff file, you will need to open this new file as well as your other RAW file taken with the long exposure for the landscape into layers within Photoshop. Here are some examples of the difference between the SLS files and the single RAW captures from my first method.
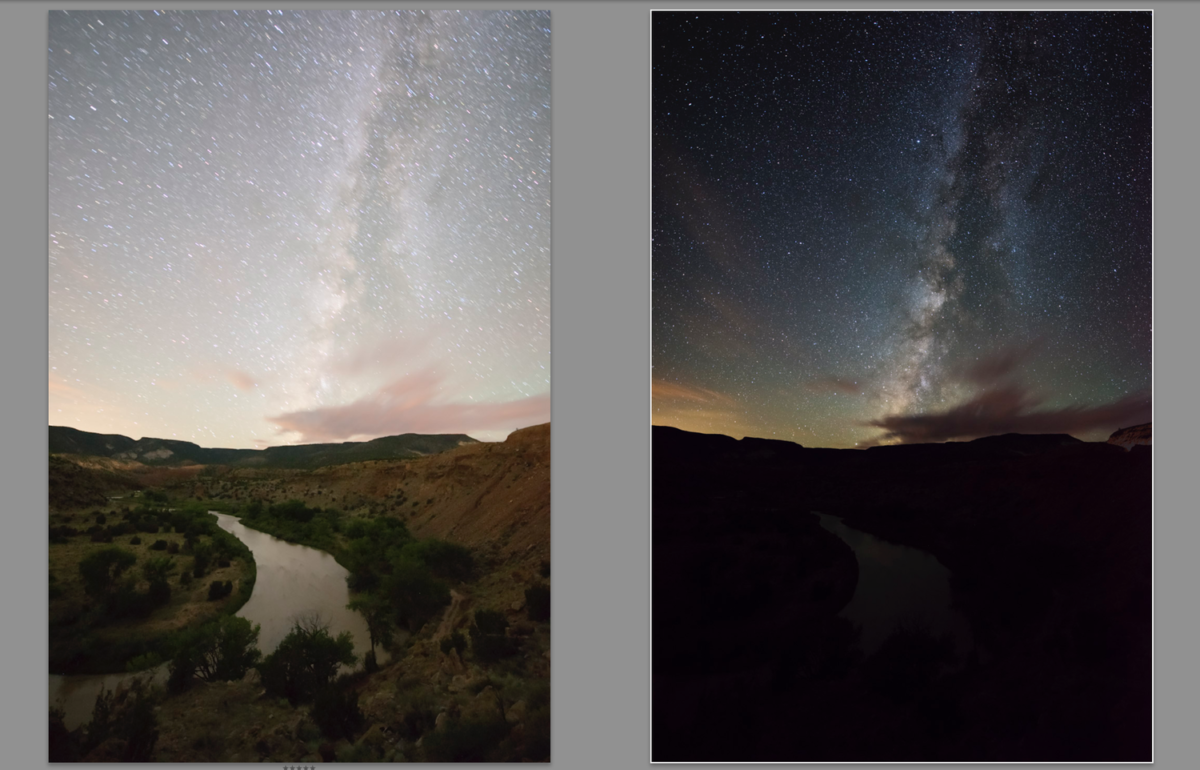
Finally, I was very pleased to notice that SLS did a great job combining the moving clouds into what would otherwise be created with a single long exposure. A special thanks to Knapp Hudson for showing me this great app while in Iceland. For $9.99 it’s a steal!
Life is short, make pictures,